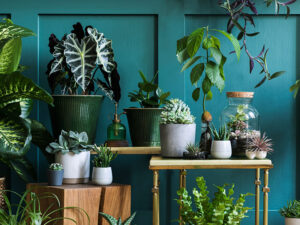
The elephant ear plant is a beautiful and sturdy perennial that can be grown outdoors in the summer or indoors as a houseplant year-round. It thrives in moist, fertile soil with lots of sun exposure and plenty of water.
This guide will tell you everything you need to know about this hardy plant, including how to care for it properly so that it will grow well all year round!
Meet The Elephant Ear Plant
The elephant ear plant belongs to the Araceae family, a large group of flowering plants that includes 114 genera and 3750 known species.
These plants are tropical and grow rapidly in hot, humid climates, and they can grow up to 9 feet tall! They can be found in both the Americas and Africa.
Elephant ears first started being imported into China and Europe during the 16th century. They were quickly adopted throughout the Southeast Asian countries of Malaysia, Singapore, Indonesia, Thailand, and Vietnam.
They are a favorite house garden plant to grow because they are relatively easy to maintain. They’re also one of the easiest plants to propagate from seeds and cuttings.
These plants show their best qualities during late summer and early autumn when the majority of other plants have started to fade or go dormant for the winter.
Where did the name “elephant ear” come from?
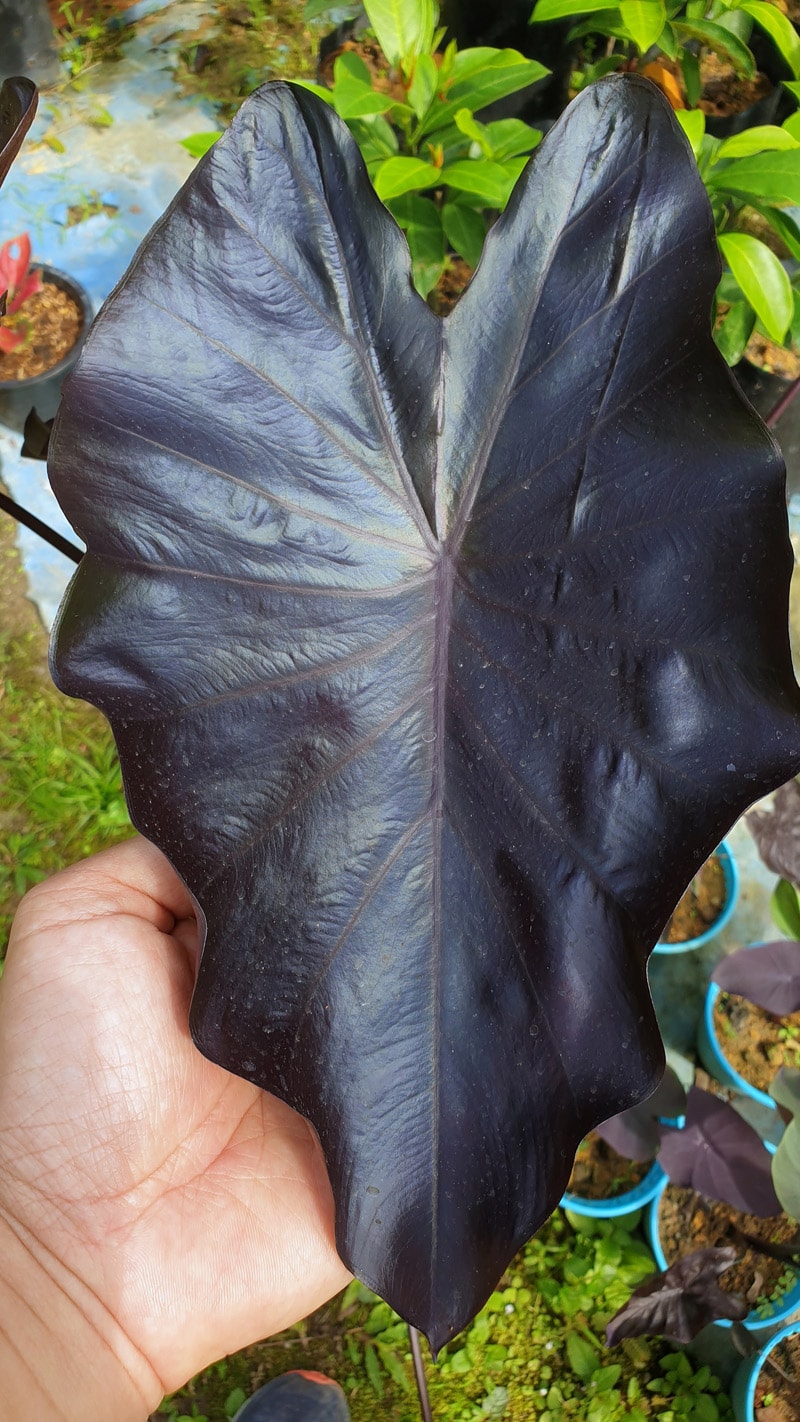
The name “elephant ear” came from the fuzzy, round leaves which resemble an elephant’s ears. The most common species are Colocasia esculenta and Alocasia macrorrhiza Odora. Let’s take a look at the different types below.
Types of Elephant Ear Plants
Alocasia macrorrhiza Odora (Upright Leaves)
The alocasia has broad, upright leaves that are perfect for containers. Plant them around your patio, by your front door or near a water feature, and watch the breeze catch their paddle-shaped leaves! This plant is best grown as a houseplant during the winter months.
Colocasia esculenta (Downward-facing Leaves)
The most popular species of elephant ear plants are Colocasia esculenta and Xanthosoma sagittifolium because they thrive in a variety of climates, from the tropics to cooler environments like the United States.
These two types have leaves that grow very large but can be shaped by trimming them back periodically if desired. They’re also easy to propagate as cuttings or from seeds, which is why they’re so popular.
Elephant Ear Plant Care: The Basics
The best place to grow elephant ears is outside in moist soil with lots of sun exposure and plenty of water. Indoors, they are happiest (specifically the alocasia) when grown as houseplants in a pot with moist soil, lots of water, and plenty of sunlight.
When caring for elephant ears indoors, it’s important to keep them in the most natural environment possible so that they’re happy. These plants can go dormant during the winter months when there is less sun exposure. They need about 16 hours’ worth of light every day or else their leaves will be green but small and thin.
The best place to put these plants would be near a bright window where they’ll get as much direct sunlight as possible! When grown outdoors, however, elephants love full sun all day long without any shaded areas around them – no problem because this plant thrives on heat and humidity like its native habitat!
One thing you should always remember is to keep the soil moist and fertilized. When grown indoors, they need to be watered once per day because their short roots don’t have access to as much water as outdoor plants do. Elephant ears also thrive when you plant them in rich, loamy soils that are constantly kept damp with regular watering.
Elephant Ear Plant Care: Quick Guide
- Light Conditions: Best in bright, indirect sunlight but can also be grown as a houseplant with 16 hours’ worth of light.
- Water: Keep moist at all times. Water once a day, or once every other day during periods of high heat and humidity.
- Humidity: These plants thrive in hot and humid conditions. If you struggle to provide a humid environment indoors, consider a small humidifier (I love this one).
- Temperature: 70 to 85°F is ideal, and nights no lower than 60°F.
- Fertilizing: Elephant ears are considered heavy-feeders. They require rich, fertile, soil. You’ll want to be sure to fertilize your plants about once a month with a slow-release fertilizer that is water-soluble. (Miracle-Gro makes a great one that I personally use)
- Potting Soil: Rich and loamy, constantly dampened soil (but well-drained). Adding a small amount of peat moss and/or perlite to your potting soil will help create an optimal growing medium for these plants.
- Repotting: When you need to re-pot, the new pot should be at least two inches bigger than its current size. This will give room to accommodate for any future growth or more roots that may grow out of it over time.
- Pruning: Remove damaged leaves, or thin out overgrown stems to give more light exposure and airflow.
- Planting: This one is best planted in the spring (after the danger of frost from the winter has passed).
- Propagating: Elephant ears are great for propagating from cuttings or seeds. They’ll grow best when planted where they’ll get plenty of light. Avoid shady areas (no problem because this plant loves the heat!).
Pests & Other Things That Can Go Wrong
Pests
The elephant ear is prone to a number of pests, including thrips, aphids, mealybugs, and spider mites.
A great way to fight pests is by using a Katchy. This little device has been a game-changer for me. I have four of them set up in our home, each around my more problem-causing plants. I turn them on at night and change out their sticky pads once every week or two depending on the bug activity.
Brown Edges
Sometimes a plant will start getting brown edges on the leaves that are exposed to too much light or heat. This is normal for plants of all kinds. It’s not something you need to worry about if it only happens in one spot. Just cut off those browned leaves (or trim them back) so new growth can flourish!
If it happens in multiple spots, it’s likely due to a problem in your environment. The most common culprits are watering too much or not enough. So keep an eye on how often you’re giving it water and try to stick with the schedule as best you can! (If you need to create a more humid environment, consider getting a little humidifier – I love this one.)
These plants also can suffer from root rot if they stay in moist soil for too long without draining out any excess water. It can be difficult to spot because roots tend to decompose quickly. But it is possible that browning leaves may indicate this condition if other factors have been ruled out. To help combat this, make sure that while the soil remains damp, it is well-drained.
It will take some time before new growth emerges after trimming back browned edges – don’t worry about leaving them bare! They’ll grow again soon once all of the stress is gone (and remember: keep an eye on watering!).
Leaf Spot
This is a fungus that can show up on your plant. And it’s not something you should worry about too much. It will usually start as just one or two spots, which are brownish-black in color and have a watery appearance.
It won’t do any harm to your elephant ear plants. But if they’re starting to cover the leaves so badly that some of them are falling off (or there are only a few left), then it might be time for either repotting or getting rid of those infected areas altogether. Cut away all parts with bad leaf spots until only healthy tissue remains.
Yellow Leaves
If your plant starts to get yellow leaves, then there may be another problem – the most common causes of this are root rot or a bug called a fungus gnat. Take a look at your roots and check to see if they’re browning and rotting before you start treating for potential pests.
The Danger of Frost
This plant is pretty tough and can handle some frost – but if it’s going to get below 45 degrees Fahrenheit, we recommend moving the plants inside (until the frost has passed) or taking them out of their containers. You don’t want to expose these delicate roots!
If you’re going to transplant an elephant ear and “dig up the tubers” (as these plants actually grow from tubers, not “bulbs” as most people refer to them), the first step is digging them up without causing any damage. In order to do this, we recommending starting to dig about a foot away from where the base of the plant sits. Be careful when lifting the tuber/bulb!
When replanting this plant, you want to dig a hole deep enough to keep the tuber/bulb 4 inches deeper than the soil line. Cover with the 4 inches of soil, and keep these plant babies inside until temperatures have warmed up.
Please note: Elephant ear tubers/bulbs and leaves contain calcium oxalate or oxalic acid. This can cause skin irritation and burning. When you’re tending to these plants, be sure to always wear gloves!
Propagation
If you want to propagate your elephant ear, there are two ways: cuttings or seeds. Each has its benefits and drawbacks. But it’s really up to you which way suits the type of grower that you are in terms of patience level, time commitment, etc.
Cutting propagation is a process where the plant is divided into pieces. This will then grow and become a new plant. The advantage to this is you get more plants for your effort than just one seedling or cutting would provide.
You can also do an easy division of the potted plant if it’s getting too big in its pot. Divide off some branches with leaves on them. Next, repot those removed from the parent plant into individual containers (or share!). And finally allow these cuttings room to spread out their roots. This will allow the roots to establish themselves as separate entities outside of the overcrowded mother plant.
It Takes Patience
The downside? It takes time! Propagating by cuttings requires patience because each new growth has to wait before blooming again – typically about nine months later. And that means waiting another nine months for cuttings to grow into new plants.
Seed propagation is a much quicker method of getting more plants. And this has the added benefit that you can choose your plant’s characteristics before it ever sprouts up from its seed pod! You can find seeds in several different ways. Sometimes they are given away by nurseries or other vendors as promotional items. And others have been passed down within families and communities over generations.
After harvesting them (after waiting about three days so the pulp surrounding each seed dries), then you sow them directly into moist soil. You’ll want to be sure the soil has good drainage. Also, be sure it’s near an area where they’ll receive plenty of sunlight without any shaded areas around them.
The downside? Waiting time again: Seedlings typically take at least one to two months to fully develop roots and leaves from when they’re planted.
Editor’s Note:
As an entrepreneur and now an avid plant mom, I thoroughly enjoy the balance that plants bring to my life. I’m not great at stepping away from work. But taking care of my plants requires that of me – and in return, rewards me with a sense of calm. I hope you find the same beauty in your relationship with your plants! Best of luck with your plant darlings, and stay tuned for more of our plant care guides!

Emily Sprinkle, also known as Emma Loggins, is a designer, marketer, blogger, and speaker. She is the Editor-In-Chief for Women's Business Daily where she pulls from her experience as the CEO and Director of Strategy for Excite Creative Studios, where she specializes in web development, UI/UX design, social media marketing, and overall strategy for her clients.
Emily has also written for CNN, Autotrader, The Guardian, and is also the Editor-In-Chief for the geek lifestyle site FanBolt.com